Repairing 3D Scans
Raw 3D scans often contain holes, stray pieces, or rough areas that need cleaning up before you can design on them. The repair tools let you split, clip, fill, reshape, and smooth a scan into a clean base. To open them, start from your project:
- Navigate to your project.
- Click on the 3D scan you want to repair.
- In the dialog that appears, select the Repair button.
For insoles, an open scan is enough to design on, small holes are fine. For shoe lasts and AFO braces the scan has to be fully closed first, so use Fill Holes to be sure the scan is closed before you continue.
Repair Options
Once you've selected a scan, the following repair options will be available:
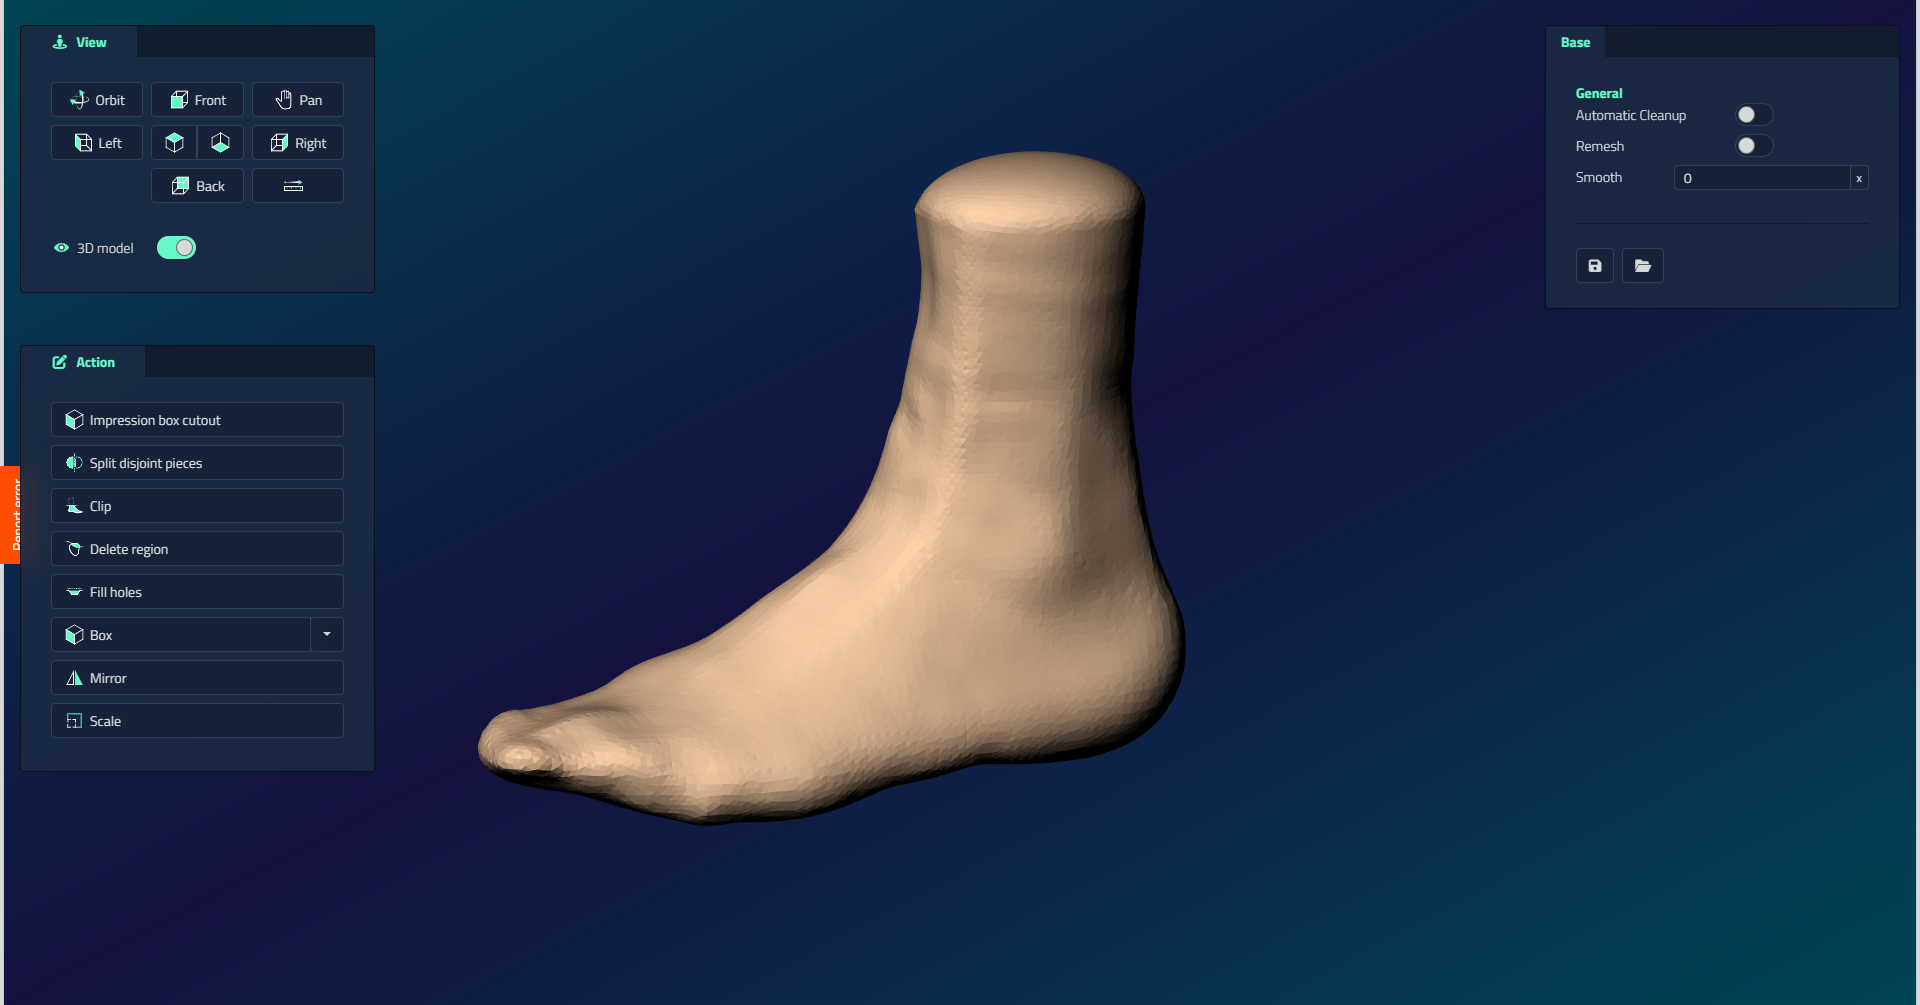
1. Split Disjoint Pieces
If the scan contains several separate parts, this option splits them apart.
- Click on the part you want to keep.
- Confirm your selection on the right-hand side.
2. Clip
- Click on 2 points on the screen to create a line.
- LutraCAD will split the scan along this line.
- The red part will be removed.
- The green part will be kept.
- Use the buttons to:
- Cancel: Abort the operation
- No: Flip the part you want to remove
- Yes: Confirm the selection
3. Delete Region
- Draw a polyline to select a region.
- LutraCAD will automatically close the polyline.
- The selected region will be deleted.
4. Fill Holes
LutraCAD will close all open areas, attempting to follow the shape of the scan to maintain a natural appearance.
Transform tools
LutraCAD also provides transform tools to reposition and resize the scan:
| Control | What it does |
|---|---|
| Box | Modify the 3D scan using the box size presets. |
| Rotate | Rotate the scan to align it. |
| Mirror | Mirror the scan across the medial plane (the vertical plane that divides the foot into inner and outer halves). |
| Scale | Uniformly scale the scan. |
| Impression Box Cut Out | Box-cut away excess material: click points on the scan (at least 3), then right-click or Enter to finish. |
Default Options
On the right side of the screen, you'll find these default options:
| Option | What it does |
|---|---|
| Automatic Cleanup | Cleans the scan in one step: removes stray pieces, fixes rough and pinched edges, and smooths sharp regions. Use it only on full foot scans. |
| Remesh | Reduce a very detailed scan to a lighter one, so the software keeps running smoothly. |
| Smooth | Apply smoothing to the scan surface. Enter the number of times the smooth should be applied. |
Automatic Cleanup is useful for quickly cleaning up complex scans.
For stray floating pieces or noise islands next to the foot, use Split Disjoint Pieces and click the foot to keep, rather than Automatic Cleanup.