Navigation
Screen layout
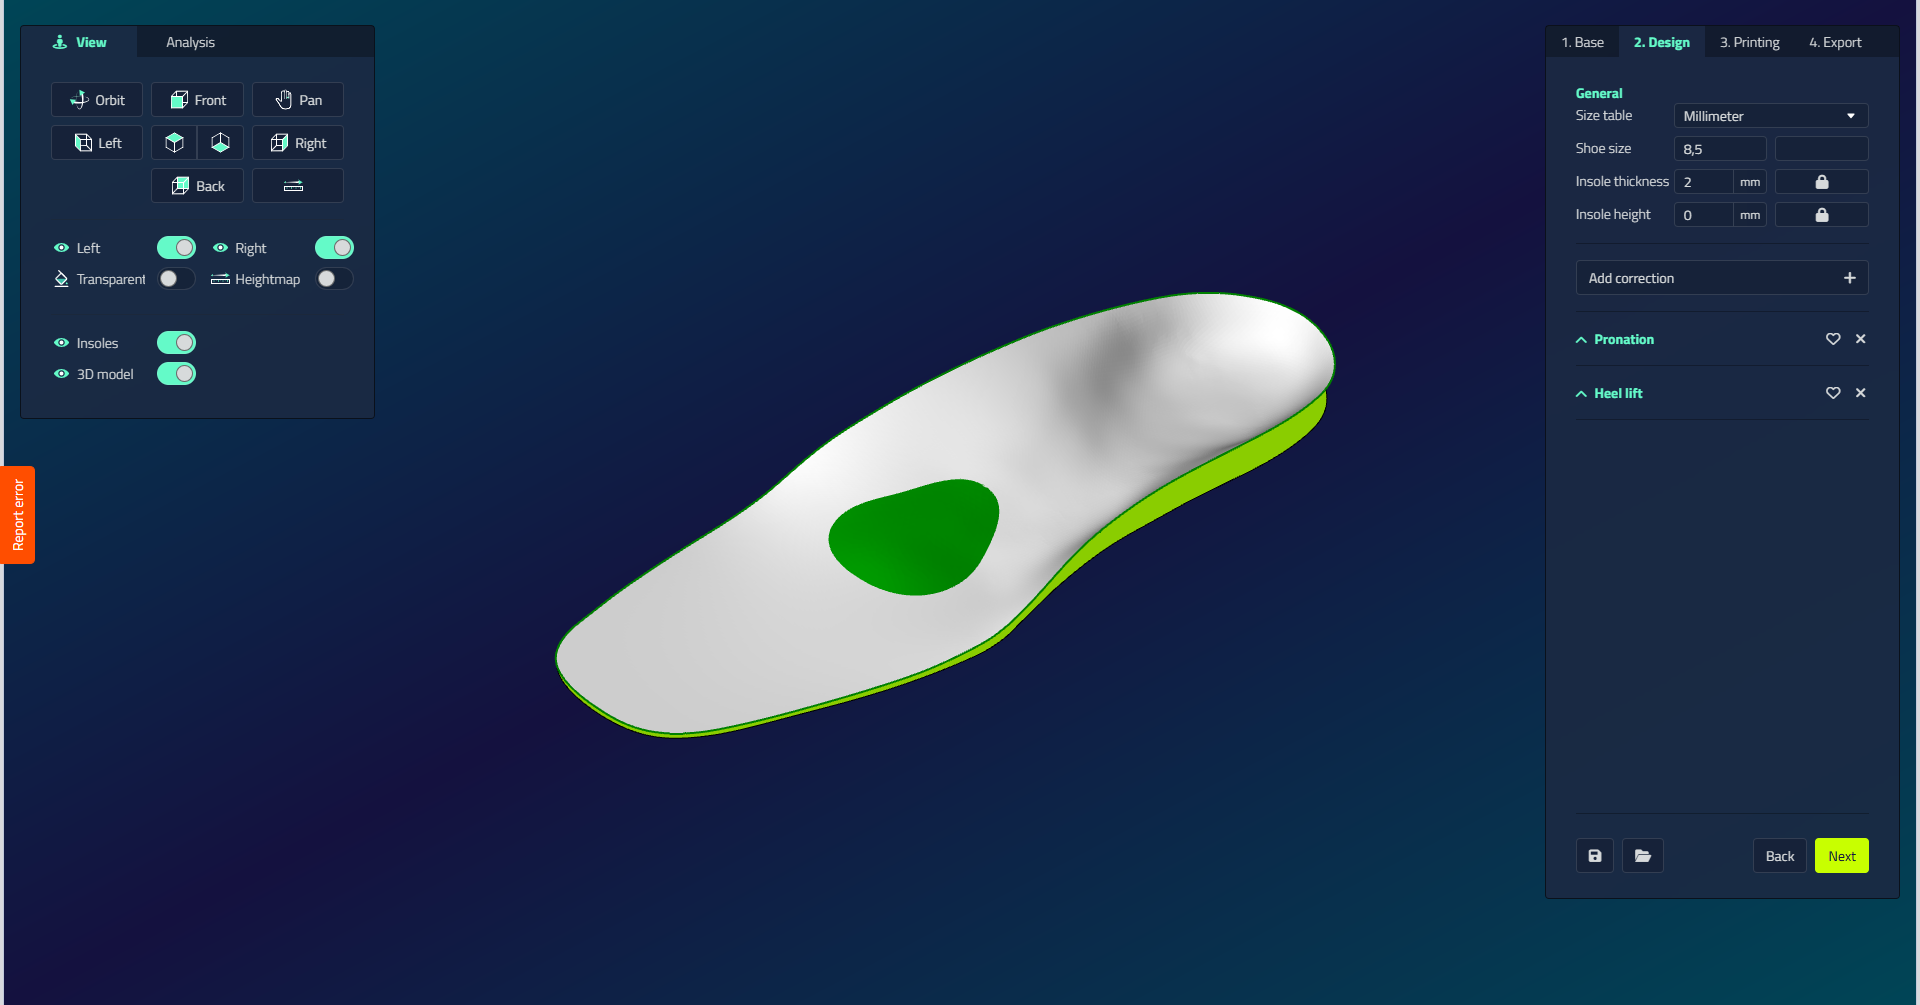
Every domain in the design environment (insole, shoe last, brace, production, scan repair, and library) shares the same screen layout. Learn it once and it applies everywhere:
| Area | Location | Contents |
|---|---|---|
| Step bar | Right side | The workflow steps for the current domain (for example Base → Design → … → Export) |
| Navigation panel | Left, upper | View buttons, visibility toggles, and measurement data, in a View tab and (in some domains) an Analysis tab |
| Action panel | Left, lower | The actions available for the selected object, plus the action History tab |
| 3D viewport | Centre | The model itself: scans, pattern, and the product you are designing. Click to select, drag to manipulate |
| Resource/settings panel | Top right | The editable properties of the selected object or action: fields, dropdowns, and checkboxes |
The navigation toolbar
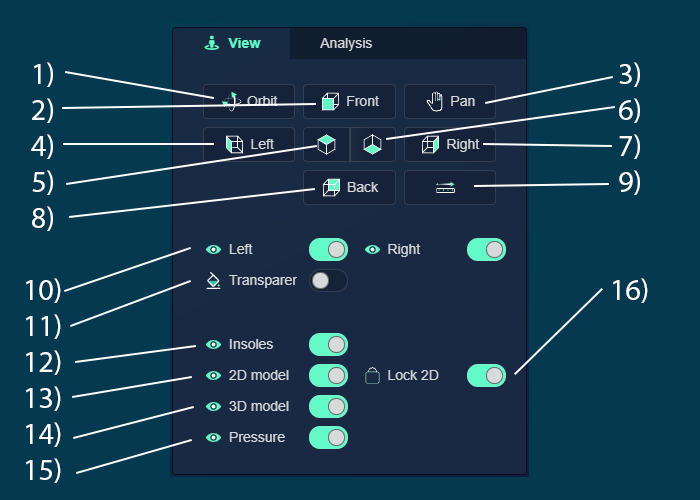
The toolbar in the top left of the design environment holds the controls for moving the camera, viewing the product from set angles, measuring, and showing or hiding parts of the scene. This page lists what each button does.
The numbered callouts below match the numbers on the toolbar in the image.
Navigation and View Controls
| # | Control | What it does |
|---|---|---|
| 1 | Orbit | Rotate around the product |
| 2 | Front View | View from the front |
| 3 | Pan | Move the screen around |
| 4 | Left View | View from the left side |
| 5 | Top View | View from above |
| 6 | Bottom View | View from below |
| 7 | Right View | View from the right side |
| 8 | Back View | View from the rear |
Analysis Tools
| # | Control | What it does |
|---|---|---|
| 9 | Measuring Tool | Measure distance between points A and B |
Display Controls
| # | Control | What it does |
|---|---|---|
| 10 | Left / Right | Two separate checkboxes, one per foot side, to toggle visibility of that side's elements |
| 11 | Transparent View | Enable see-through view of the product |
| 12 | Show/Hide Insoles | Toggle visibility of insoles |
| 13 | Show/Hide 2D Scans | Control display of 2D scan data |
| 14 | Show/Hide 3D Scans | Manage visibility of 3D scan information |
| 15 | Show/Hide Pressure Data | Toggle display of pressure data overlays |
| 16 | Lock 2D Scans | Prevent accidental selection/movement of 2D scans |
Shoe last and brace visibility toggles
In the shoe last and brace domains, the navigation panel adds a few extra toggles alongside the ones above, so you can compare the different models involved in a correction:
| Toggle | Shows or hides |
|---|---|
| Shoe Last | The shoe last itself |
| Corrected model | The last after your corrections have been applied |
| Midsole | The midsole |
Linked Scan Foot keeps the 3D scan moving together with the foot, so the two stay lined up when you reposition either one.
Height map
Turn on Heightmap to colour the model by height instead of by material or texture: warm colours (red, orange) mark the higher points, cool colours (blue, green) mark the lower points. It is a fast way to spot high and low spots on a scan or a design.
Analysis tab
Where available, the navigation panel has a second tab next to View: Analysis. The read-out follows the mouse: wherever you hover over the model, a cross-section appears together with the height at that position.